For 2000-2001 Dodge Ram 1500 13pc Steering Parts Front Tie Rod Suspension Kit
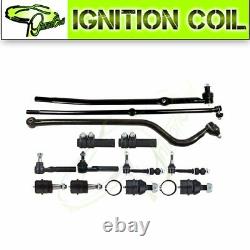
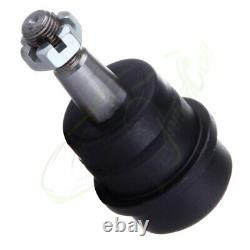
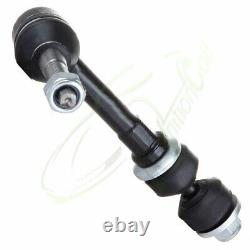
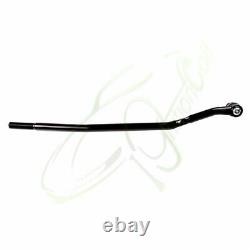
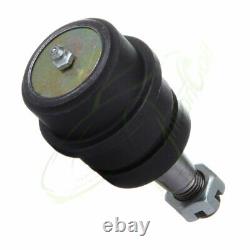
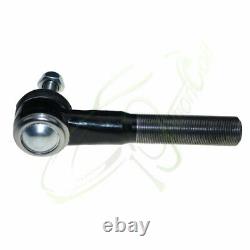
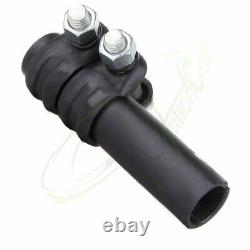
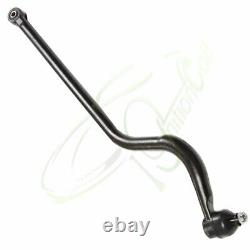
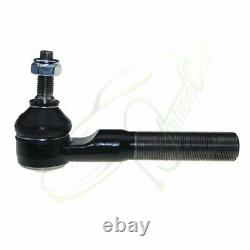
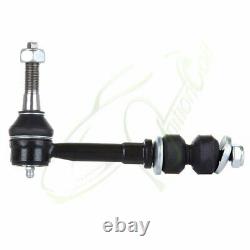
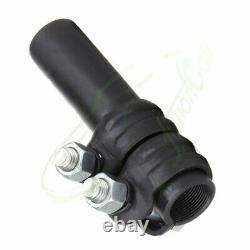
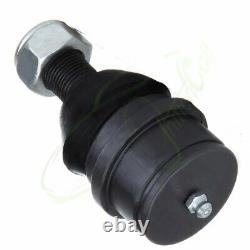

2000 - 2001 Dodge RAM 1500 All 4x4 ; 4WD ; 4-Wheel Drive Models Only. 2x Part# Front Lower Ball Joints - K7401 2x Part# Front Upper Ball Joints - K3134T 2x Part# Front Sway Bars End Links - K7453 1x Part# Front Outer Tie Rod End - Driver Side - ES3526 1x Part# Front Right Inner Tie Rod End - ES3527 2x Part# Tie Rod Ends Adjusting Sleeve - ES2012S 1x Part# Outer Tie Rod End - Passenger Side - DS1460 1x Part# Inner Tie Rod End - Driver Side - DS1462 1x Part# Front Track Bar - DS1413.
Please refer to Moog official website before narrowing down your search so as to avoid unnecessary item not as described return requests. Please contact our customer services for targeted discount after all the items are received if you have reached any targeted discount thresholds, the terms of which is at the bottom of this page. Control Arm Bushing Replacement Reference. Control arms themselves do not generally wear out, but the control arm bushings and ball joints do, so you will likely need to remove them to service those components. Also, control arms can become bent or damaged as the result of a collision or driving through a deep pothole, so control arms do need to be inspected for damage. Many control arms are now made from forged or sintered aluminum, so you may need to measure for damage or check it on an alignment machine. Remove the coil spring and steering knuckle by following the steps in previous skill drills. Loosen the bolts holding the upper control arm in place. Note that there might be shim packs held in by the bolts. If so, tape them together in their packs, and label their positions.Remove the lower control arm by removing the bolts holding it in place. As you dismantle the system components, carry out a constant inspection of the parts being removed.
Doing so will aid you when you need to order replacement parts. You should also mark mating parts with white paint to aid in reassembly. Inspect the upper and lower control arm for wear or damage. If the control arm bushings show signs of excessive wear or deterioration of the bushing material, they will have to be replaced.
Replace the worn bushings in the upper and/or lower control arm. Replacement of control arm bushings can be performed two ways - with a hydraulic press with correctly sized press tools or with an air chisel. Be careful using an air chisel: Damage to the control arm can result, such as gouging the mounting surface of the bushing if you slip with the chisel. Press method: Place the control arm in a hydraulic press supported so the bushing is level to the press head. Using the correct-sized adapter, press the bushing out. Using the press, install the new bushing into the control arm. Be careful to start the bushing in straight, or you could bend the control arm.Press it in until the flange bottoms out. Air chisel method: Install the control arm in a vise.
Use an air chisel to work the bushing out. Be careful not to gouge the mating surface of the control arm. Using the air hammer, drive the new bushing into place, making sure it is fully seated. Some ball joints use zerk grease fittings, which allow for periodic lubrication of the moving ball and stationary socket inside the ball joint. Grease fittings can sometimes be found on other suspension components and need to be lubricated as part of a preventive maintenance program provided by the OEM.Loaded Upper Ball Joint Play Measurement. The most common problem in the suspension system is play, or looseness of the parts. Although many of the parts are designed with special connections that allow for movement to accommodate movement of the wheels, excessive play is actually a bad thing. Excessive play magnifies the feel of road imperfections and makes the steering less responsive to steering wheel input. Excessive play is potentially very damaging, as it causes wear on the connecting parts and tires.
Naturally, any amount of play in a fixed part is problematic and is frequently a result of part failure. Remember, unwanted looseness in the suspension system can be extremely dangerous and should be corrected as soon as possible. Obtain a properly sized block of wood to fit between the upper control arm and the frame. Place the block of wood between the upper control arm and frame so that it is secure.
Raise the vehicle by lifting the body, using the specified lift points, so that the tire is a few inches off the ground. Support the body with a jack stand.
Place a dial indicator on the upper control arm and vertically against the steering knuckle. Place a pry bar under the tire, and pry it upward, watching the dial indicator reading as you pry and release.
Record the total amount of movement in the joint, and compare to the OEM specifications. Rock the bottom of the tire in and out, watching for play in the lower ball joint, and compare to OEM specifications.Loaded Lower Ball Joint Play Measurement. Jack up the vehicle, place safety stands under the control arms, and look up the exact procedure in the online service information. Place a dial indicator on the lower control arm and vertically against the steering knuckle. Place a pry bar under the tire and pry it upward, watching the dial indicator reading as you pry and release. Rock the top of the tire in and out, watching for any play in the upper ball joint specifications.
Tie Rod End Removing Guideline. Tie rods make the final connection between the steering linkage and the steering arms. The point of connection with the steering linkage is considered the inner tie-rod end, and the end that connects to the steering arm is considered the outer tie-rod end. Checking tie rods is important in identifying steering problems because the ends are frequently damaged or worn.
There are two basic types of tie-rod ends: spring loaded and preloaded. Each type has its own procedure for inspection and replacement of the ends. Replacement of tie-rod ends requires an alignment to be performed, or rapid tire wear will occur. Safely raise the vehicle on a lift. Inspect the rubber bellows for any signs of leaks, tears, or damage. With the vehicle raised, have an assistant turn the steering wheel to one side or the other and rock the steering wheel from side to side. On the side farthest out, squeeze the bellows until you make contact with the inner ball joint, and feel for any play in the inner tie-rod joint.Repeat this procedure for the other side. If play is found, replacement of the inner tie-rod ends will be necessary. Remove the front wheel for the side being replaced, and loosen the locknut on the tie-rod end.
Remove the cotter pin and nut holding the outer tie-rod end to the steering arm, and separate the tie-rod end from the knuckle, using a tie-rod removal tool, the double hammer method, or a pickle fork. Count the number of turns to remove the outer tie-rod end from the threaded sleeve. Remove the spring clamp from the bellows boot end to the inner tie-rod shaft, and remove the crimp clamp from the bellows boot to the rack-and-pinion housing. A new crimp clamp will have to be used on replacement of the boot.
Using an inner tie-rod tool and the specified wrench to hold the rack, loosen the inner tie rod from the rack, and remove the inner tie-rod end. Install the new inner tie rod in reverse order of removal, and verify that the play is gone.
Perform alignment to reset toe after replacement is performed. Test drive to verify repair. Sway Bar Stabilizer Link Removing Guideline. The sway bar stabilizer components help prevent body roll when cornering.
Although the stabilizer bar itself rarely gives any trouble, the rubber bushings on the bar and links wear out. This usually results in increased body roll as well as a clunking noise in the suspension. Safely raise the vehicle on a hoist, or use a jack and place safety stands under the frame. Remove the nut holding the stabilizer bar link. Remove the link by hand.Visually inspect the rubber link grommets for cracks, softness, brittleness, or wear. Repeat with the other link. Why should I get my tie rods inspected on a regular basis?
If you don't get your tie rods inspected on a regular basis, there are some warning signs to watch (and listen) for. If your vehicle pulls to one side while driving, or when braking, it's possible that bad tie rods may be the culprit. Your vehicle's tires will also show uneven wear on the inside and outside edge of the tire when there's a tire rod issue. However, one of the most noticeable signs of tie rods going bad will be a knocking sound coming from the front end of the vehicle when you turn into a parking space, or some other low speed, tight turning situation.
Vibrations One of the first symptoms that your tie rods are damaged or breaking is that the steering wheel will vibrate slightly. This is especially prevalent when you are speeding up or turning. This happens because the steering wheel is losing its control over the tires, causing the steering wheel to shimmy as you drive. Shaking As the tie rods become further damaged, you will start to notice that the car itself will start to shake.
This happens because the tires may start to wobble without you having full control over them. Although you should take your car into a mechanic at the first sign of tie rod problems, if you experience your car shaking you could be at risk for serious tie rod damage-which can cause accidents. Take your car into a mechanic if you experience this tie rod symptom. Wandering If your tie rods continue to go unchecked or unfixed, the rods can completely break.
This can cause you to lose all control of your car, possibly resulting in an accident. When this occurs, the car will may "wander" as you drive.
At this point, the steering wheel will have no control over the tires and the tires will start moving independently, causing the car to drift while you are driving. If this happens while you are on a freeway or busy road, you and others could be at serious risk of an accident. If you experience wandering, stop your car, call a tow truck and take your car to the nearest mechanic. What are the symptoms of a bad sway bar? Some of the common symptoms of a bad sway bar bushing or sway bar links going bad are: clunking noise, rattling noise, knocking uneven noise road, lack of stability when driving and noise going over speed bumps. What happens when a sway bar breaks? Because a sway bar helps the car's suspension to put more pressure on loaded springs, a broken sway bar means that the car's suspension will not be able to handle corners as well or as quickly.While it is possible to drive with a broken sway bar, as a precaution do not take corners with excessive speeds. Do I need to replace the control arm if the bushings are worn? Because the weight of the car is transferred through the control arm two rubber bushings are fitted at the pivot point and bolted to the frame. Road conditions and driving habits can contribute to the wear of these bushings which will become worn and fall apart. These bushing can be inspected by raising the car up and looking for an irregular configuration of the rubber center of the bushing.
Many control arms have the ball joint manufactured into the arm which will be replaced along with the control arm itself. When one control arm is worn it is highly advised to replace the opposing arm. What happens if a ball joint breaks? When a ball joint breaks, you will hear a mysterious noise inside your car wheel.
Your car tire will wear-out since your alignment will be broken, and you will feel the car getting out of control. If the ball joint breaks completely, it can be separated, and things can turn sour quickly. The wheel will stop being nice and can even steer you off the road. Broken ball joints will seriously affect the steering and suspension.It can even result in your wheel falling off the car. What happens if I don't replace ball joints? If you don't want to replace your ball joints, then get ready to experience some serious issues. The old ball joints cause mysterious clunking noise or drifting steering.
Once they are worn-out, it will seriously affect your steering and suspension. However, you do not need to change the ball joints if it is new. Do I need to grease new ball joints? I would say it will be a wise decision if you grease your new ball joints. At least I will always grease a new one after the installation.Greasing a new ball joint will make it stronger and extend its lifetime because there is a minimal amount of grease inside. I suggest you do so after the first installation. K3134T ES2012S DS1413 K7401 K7453 ES3526 ES3527 DS1460 DS1462. Suspension Steering Tie Rod Ends Linkages Assembly, Ball Joint.
Front Driver and Passenger Side Replacement. Ball Joint, Sway Bar, Outer Tie Rod, Inner Tie Rod, Track Bar. 5017061AA 4746696, 4746696, 68004085AA, 83500202. Proposition 65 requires businesses to provide warnings to Californians about significant exposures to chemicals that cause cancer, birth defects or other reproductive harm.Virgin Islands, Northern Marianas, Guam are not deliverable. VAP-AUTOPARTS promises free replacement due to quality defects or item not as described issues within 90 calendar days from the date when buyers receive their items in the situation when buyers are willing to provide convictive proofs or professional diagnose report if required, otherwise VAP-AUTOPARTS has the right to refuse any replacement requests.
L+R For 99-07 Ford F250/F350/F450/F550 Power Heated Turn Signal Tow Side Mirrors. 2× Ignition Coil For Ford Ranger 2.3L 2.5L F150 Expedition Lincoln Mercury FD487.
Pack of 8 Square Ignition Coil For CHEVY GMC CADILLAC 5.3L 6.0L 8.1L 4.8L UF271. 6 Ignition Coil Pack For Nissan Altima Maxima Quest Murano 3.5L V6 UF349 C1406.
Engine Radiator and Cooling Fan Kit For Toyota Solara Camry. Engine Radiator and Cooling Fan Kit For Toyota Camry Solara. Engine Radiator and Cooling Fan Kit For Volkswagen GTI Jetta. Front Brake Rotors For Ford Escape Mazda Tribute Mercury Mariner Slotted Drilled. This item is in the category "eBay Motors\Parts & Accessories\Car & Truck Parts & Accessories\Steering & Suspension\Sway Bars, Links & Bushings". The seller is "vap-autoparts" and is located in this country: US. This item can be shipped to United States.- Placement on Vehicle: Front, Left, Right, Upper, Lower
- Type: Sway Bar Link
- Universal Fitment: No
- Items Included: Mounting Hardware
- Custom Bundle: Yes
- Interchange Part Number: K3134T ES2012S DS1413 K7401 K7453 ES3526 ES3527 DS1460 DS1462
- OE/OEM Part Number: Suspension Steering Tie Rod Ends Linkages Assembly,Ball Joint
- Superseded Part Number: 5017061AA 4746696, 4746696, 68004085AA, 83500202
- Manufacturer Warranty: 10 Year
- Brand: VAP-autoparts
- Manufacturer Part Number: VAP81125201L
- Greasable or Sealed: Greasable
- Modified Item: Yes
- OE Spec or Performance/Custom: OE Spec
- Surface Finish: Polished, Rust Protected
- Quantity: 13 Pcs
- Kit Parts Included: Ball Joint, Sway Bar,Outer Tie Rod, Inner Tie Rod, Track Bar
- Features: Greasable
- Finish: Coated
- Material: Alloy Steel
- Mounting Style: Bolt-On
- Cotter Pin Hole: Yes

